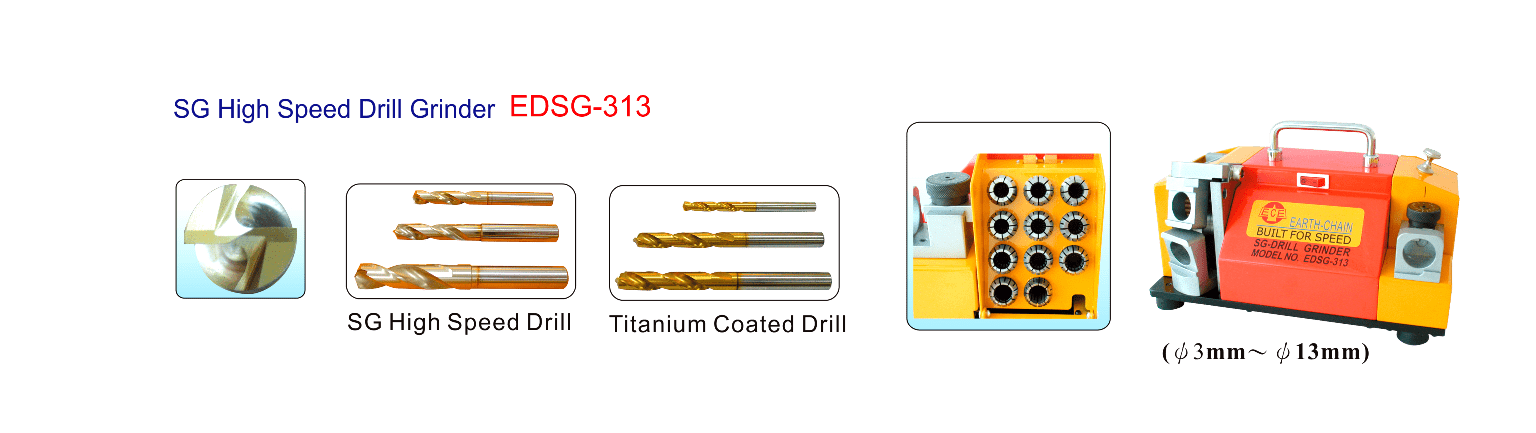
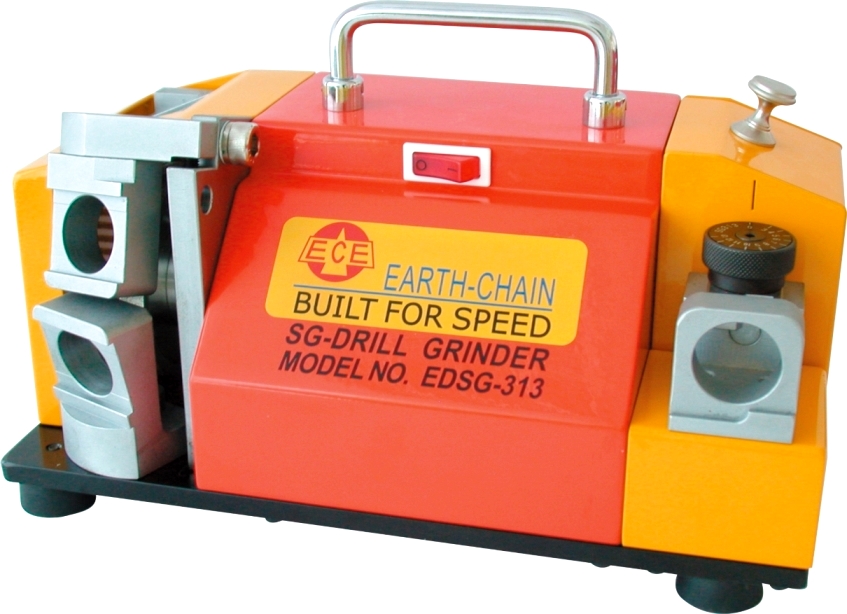
SG HIGH SPEED DRILL GRINDEREDSG-313

Product Introduction
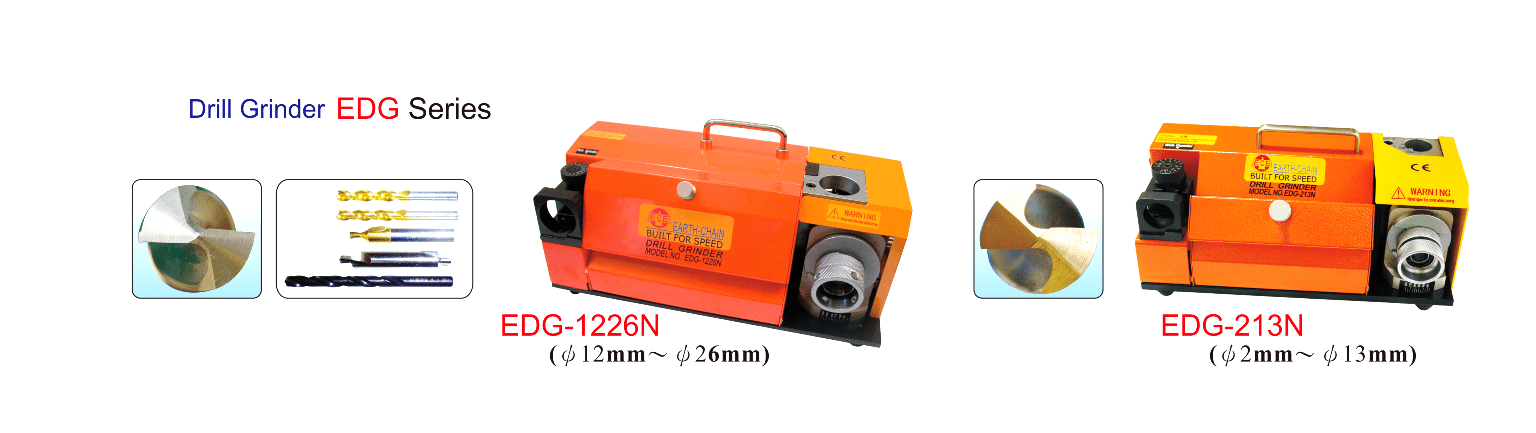
EDSG-313 (Ø3mm-Ø13mm)
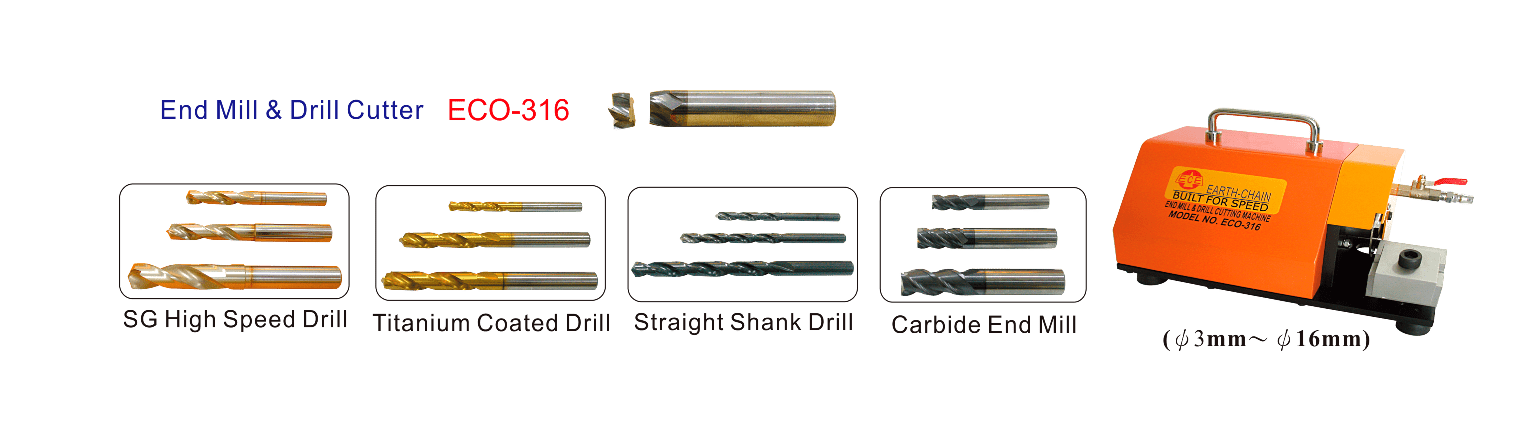
SG High Speed Drill
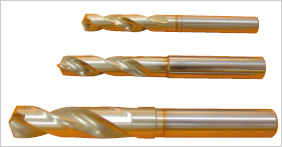
Titanium Coated Drill
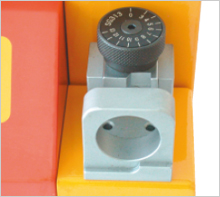
Setting (drill) base
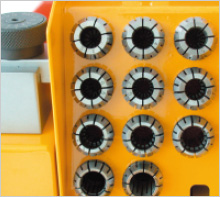
11pcs ER Collet
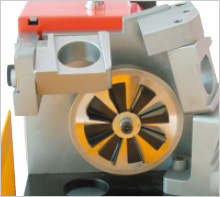
CBN Wheel
| Model NO. | EDSG-313 | Motor | 200W |
|---|---|---|---|
| Capacity | Ø3mm ~ Ø13mm | R.P.M. | 4500 R.P.M. |
| Drill Angle | 135° | Weight | 12.8 kg |
| Power Supply | AC110V / AC220V Single Phase (60Hz/50Hz) | Grinding Wheel | CBN#250 |
| Standard Accessories |
|---|
| ER collets Ø3mm ~ Ø13mm (11pcs) |
| CBN Wheel #250 × 1pc and #400 × 1pc(For Hss drill) |
| Hexagon Wrench 4mm × 1pc, 5mm × 1pc |
| Order No. | Description |
|---|---|
| EDSG-313-1C | CBN Wheel #250 (For Hss drill) Ø6mm ~ Ø13mm |
| EDSG-313-2C | CBN Wheel #400 (For Hss drill) Ø3mm ~ Ø6mm |
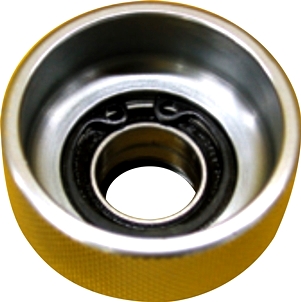
Collet Holder : bearing assembled
(More easy & convenient for tighting)
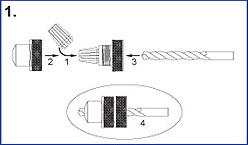
Set up the drill to the collet holder.
Follow up the steps 1, 2, 3, 4 for set up the drill to the collet holder. (without tightening) ***as shown on diagram #1
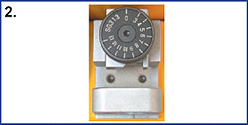
Set up the diameter of drill
- turn right the scale annulus to be "0" position.
- Adjust the scale to meet the diameter of the drill. ***as shown on diagram #2
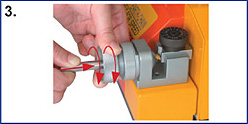
Set up the drill to the grinding position.
Insert the collet holder with drill and turn right, then tighten the drill by collet holder for set up the grinding position. ***as shown on diagram #3
Attn: The scale annulus maybe not exact for the drill diameter, because of used drill or different model of drill. Any how, please always make sure the center edge of drill must be parallel with the gap of "Collet Holder" ***as shown on the right diagram
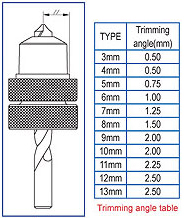
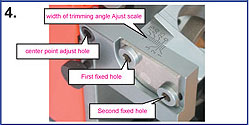
Adjust the center point of drill and width of trimming angle.
- Confirm the drill diameter first and check the suggested trimming angle (See trimming angle table at right side). Loosen the second fixed hole, then loosen the first fixed hole. Set the scale to the required diameter (scale gauge measuring same as caliper's). Reverse steps to tighten the fixed holes to grind.
- Adjust the center point to the suitable position. Turn right for bigger, turn left for smaller. ***as shown on diagram #4

Grind the center point of drill
- Insert the collet holder with drill and push to the grinding wheel slightly to grind the center point of drill until the grinding sound disappeared.
- Take out the collet holder with drill and change to the other side to grind again in same way as above mentioned. ***as shown on diagram #5
Note: The machine is adjusted before dispatched. Don't adjust unless essential.
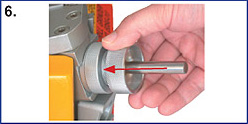
Grind the secondary clearance angle of drill
- Insert the collet holder with drill to the secondary clearance angle grinding port and push to the grinding wheel slowly to grind the secondary clearance angle of drill until the grinding sound disappeared.
- Take out the collet holder with drill and change to the other side to grind again in same way as above mentioned.
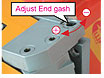
- Adjust the end gash to the suitable position. Turn right for smaller, turn left for bigger. ***as shown on diagram #6
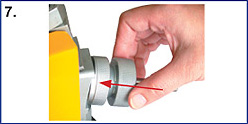
Grind the end gash of drill
- Insert the collet holder with drill to the end gash grinding port and push to the grinding wheel slowly to grind the end gash until the grinding sound disappeared.。
- Take out the collet holder with drill and change to the other side to grind again in same way as above mentioned. ***as shown on diagram #7
- Note:
1. Please always clean the grinding dust with pressurized air after grinding and wipe
with dry cloth. Then wipe antirust oil to extend the usage life.
2. Do not keep the motor running continuously for over 1 hour.
***Plase clean the grinding chip often for avoid the chip scrape to the grinding base and keep using life.
This machine is guaranteed for one year under normal operating (expendable parts and wheels are exceptions)